
Deck Restoration Made Easy: Proven Methods For Renewing Your Outdoor Living Space
Decks are wonderful additions to any home, providing a perfect spot for outdoor relaxation, entertainment, and enjoyment of nature. However, over time, exposure to the elements can take its toll, leaving your deck looking worn, weathered, and in need of some attention. Fortunately, with the right approach, deck restoration doesn't have to be a daunting task. In this comprehensive guide, we'll explore proven methods and techniques for renewing your outdoor living space, bringing your deck back to its former glory.
Assessing the Damage: Understanding Your Deck's Condition
Before diving into the restoration process, it's essential to assess the current condition of your deck. Take a close look at the wood, checking for signs of wear, rot, mold, mildew, or other damage. Pay attention to areas that receive the most sun exposure or are prone to moisture buildup, as these are often the most vulnerable to deterioration. Signs of Damage to Look For:
- Cracks and Splinters: Inspect the surface of the deck for cracks, splinters, or loose boards. These can not only detract from the appearance but also pose safety hazards.
- Discoloration: Noticeable discoloration or fading of the wood indicates sun damage and weathering.
- Mold and Mildew: Look for dark spots or fuzzy patches, which are signs of mold and mildew growth. These can thrive in moist, shady areas and compromise the integrity of the wood.
- Rot: Soft, spongy areas or wood that easily crumbles indicate rot, a serious issue that requires immediate attention to prevent further damage.
Cleaning and Preparing the Surface
Once you've assessed the damage, the next step is to thoroughly clean the deck surface to remove dirt, grime, mold, and mildew. This step is crucial for ensuring proper adhesion of any stains or sealants applied during the restoration process.
- Sweep Away Debris: Start by sweeping the deck surface to remove any leaves, dirt, or other debris.
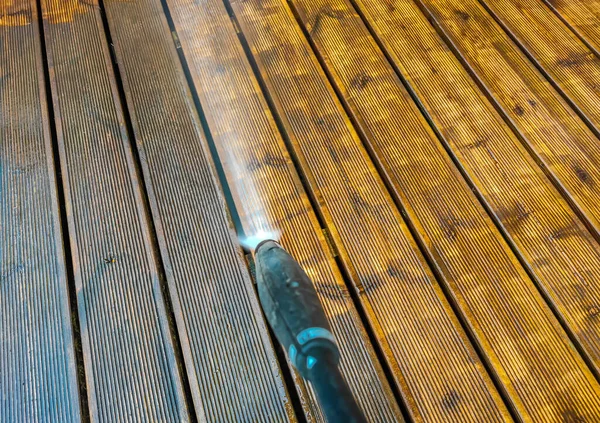
- Use a Pressure Washer: For heavily soiled decks, a pressure washer can be highly effective. Use a mild detergent and low-pressure setting to avoid damaging the wood.
- Scrub Stubborn Stains: For stubborn stains or mold spots, scrubbing with a deck cleaner and a stiff brush may be necessary.
- Rinse Thoroughly: After cleaning, rinse the deck surface thoroughly with clean water to remove any remaining cleaner or debris.
Steps for Sanding and Refinishing:
Sanding and refinishing your deck is a critical step in the restoration process, as it not only improves the appearance of the wood but also helps protect it from the elements. Follow these steps to ensure a smooth and successful refinishing project:
Choose the Right Equipment
Before you begin sanding, gather all the necessary equipment, including a belt sander or orbital sander, sandpaper in various grits (coarse, medium, and fine), safety goggles, a dust mask, and ear protection. Ensure that your sander is equipped with a dust collection bag or hook-up to minimize cleanup.
Apply Stain or Sealant
With the deck surface clean and dry, it's time to apply the stain or sealant. Choose a high-quality product specifically designed for outdoor use, and follow the manufacturer's instructions for application. Use a brush, roller, or sprayer to apply the stain evenly, working in small sections and following the direction of the wood grain. Allow the first coat to dry completely before applying additional coats if needed.
Regular Maintenance Tips:
Maintaining your newly restored deck is essential for preserving its beauty and structural integrity over time. By following these regular maintenance tips, you can ensure that your outdoor living space remains a welcoming retreat for years to come:
Inspect Annually
Schedule an annual inspection of your deck to check for any signs of wear, damage, or deterioration. Look for loose boards, cracked or splintered wood, rusted fasteners, and any areas of rot or decay. Addressing issues promptly can prevent them from worsening and prolong the life of your deck.
Clean Regularly
Keep your deck clean by sweeping away debris, leaves, and dirt regularly. Use a leaf blower or broom to clear off the surface, paying particular attention to areas where debris tends to accumulate, such as corners and crevices. Periodically rinse the deck with a garden hose to remove stubborn dirt and grime.

Reapply Sealant
Depending on the type of sealant used during the restoration process, you may need to reapply it every 1-3 years to maintain optimal protection. Signs that your sealant may need to be reapplied include fading, peeling, or water no longer beading on the surface. Before reapplying sealant, thoroughly clean the deck surface and allow it to dry completely.
Inspect and Repair Railings
Check the stability and integrity of your deck's railings and balusters regularly. Ensure that all fasteners are tight and secure, and replace any damaged or rotted components as needed. Pay attention to areas where the railing attaches to the deck structure, as these are common points of weakness.
Trim Plants and Trees
Keep plants and trees near your deck trimmed to prevent leaves, branches, and sap from accumulating on the surface. Overhanging branches can also create shaded, damp areas that promote mold and mildew growth. Trim back any vegetation that encroaches on your deck space to maintain adequate airflow and sunlight.
Check for Signs of Mold and Mildew
Keep an eye out for signs of mold and mildew growth on your deck, especially in shaded or damp areas. Dark spots, fuzzy patches, or a musty odor are indicators of mold and mildew presence. If you notice any signs of mold or mildew, clean the affected areas promptly using a solution of water and mild detergent or a commercial deck cleaner.
Hawthorn VIC, Australia
Phone: 1800-332-525